
This is another post from my series on OpenStreetMap map design – kind of following up on what i wrote about waterbodies and fords some time ago.
Water barriers
The first part is about rendering of water barriers – with this i mean dams, lock gates and weirs as well as waterfalls. Like with fords most of these can be mapped as nodes on a waterway line. Waterfalls can only be mapped as nodes – the waterfall edge as a one-dimensional geometry is to be mapped as a cliff. The standard style renders the node based lock gates and weirs using plain circles in the drawing width of a river starting very late at z17. This is rather crude.

Weirs and lock gates mapped with nodes in OSM-Carto
For waterfalls OSM-Carto recently added rendering as simple POIs – likewise independent of the intersecting waterway.
Like in case of fords it is possible to contruct a line geometry by querying the intersecting waterway. For dams, weirs and lock gates this allows drawing the barriers in the same styling as in cases when they are mapped using a way. For waterfalls it allows a fairly compact yet intuitive display.
I also changed the styling of weirs to indicate the direction of water flow. Node based lock gates and waterfalls are likewise shown with the direction visible. For weirs and waterfalls this is done with a brighter line below indicating the whitewater area below the weir/waterfall. For node based lock gates the line is drawn with a small angle indicating the opening direction.

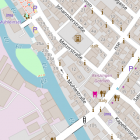
water barrier rendering at z12-z14, click for z15 version

z17 water barrier rendering
The difficulty here is that the rendering toolchain used for this style (and in fact any commonly used rendering toolchains) make this kind of thing rather complicated to implement. Identifying the intersecting waterway is obviously something you need to do on the database level using SQL. But the geometry to be generated has to be adjusted to the width of the waterway which means you need to do zoom level dependent parametrization of this geometry in SQL code.
Here a few practical examples how this looks like.

Waterfall rendering with flow direction hint at z17

Weir rendering with flow direction hint from line based mapping at z16

Waterfalls on streams at z16

Lock gates mapped with nodes at z15

Weir mapped with node at z17
With weirs and lock gates drawn in the same styling both when mapped as ways and nodes the question arises which method of mapping is better. The problem is that waterways are typically drawn thicker than their real width at small scales, otherwise they would not be well visible, and thinner than their real width or in their real width (in case they are mapped with a riverbank polygon) at larger scales. In the simplest case the line geometries i construct from the nodes are based on the drawing width of the waterway. This means the rendering looks good on small scales but does not work on larger scales with a riverbank polygon if that is not taken into account when generating the line geometry.


 Locks in river line drawing width based size
If a weir is mapped with a line across the riverbank polygon this OTOH looks good on high zoom levels but not on the smaller scales since the line geometry is too short there and does not cover the larger-than-real drawing width of the waterway at these scales. I have also implemented solutions of these two other cases but they are significantly more complex than the first case.

Taking riverbank width into account
Here for better understanding the different situations all together – first as rendered in OSM-Carto, second with the techniques i introduce here.
| node | way | |
|---|---|---|
| low zoom |  |
 |
| high zoom |  |
 |
| node | way | |
|---|---|---|
| low zoom |  |
 |
| high zoom |  |
 |
So overall mapping water barriers as nodes or linear ways are both fine for the purpose of rendering – as i demonstrate here. Mapping these features with polygons however – no matter how exactly you define the outline of them – is much more difficult to process so much less useful for the purpose of generating high quality maps. For dams polygon mapping is widespread and generally accepted. For the other types of barriers it is – although clearly not suggested by the documentation – not that uncommon due to the widespread misguided idea that mapping things with polygons is universally better than any other option.
One other thing that is important for efficient rendering is to split the mapping of riverbank polygons into relatively small areas and not build polygons extending across hundreds of kilometers.
Another problem with the current toolchain is that for labeling i would have to do all of these queries twice since the labels are drawn in a different layer and you cannot reuse queries across several layers. For the moment i refrained from doing that so labels for water barriers are just point labels and not aligned in direction of the barrier as drawn.
I am not completely sure how this kind of rendering approach fares in terms of mapper feedback. In most relatively simple cases i think producing a rendering based on a reasonable and consistent interpretation of the data like this is fine, even if it goes quite a bit beyond a simple and direct visualization of the data. And in my opinion it is a positive message if mappers see that a relatively simple form of mapping (like a node for indicating a barrier on a waterway) is sufficient information to accurately draw this and the mapper is not required to hand draw the map so to speak. But in particular with the two more sophisticated cases (node based mapping at high zoom with riverbank polygon and way based mapping at low zooms) it is likely that there are some data configurations where the method fails in a non-intuitive way. How problematic this can be is an open question. This is certainly a topic where there is far too little experience to draw reliable conclusions.
Water sources
The other change i worked on is cleaning up the mess with water related point features in OSM-Carto. One of them – the waterfall – is already covered above. The other two water related point features in OSM-Carto at the moment are fountains and springs. Together with waterfalls these three water related features use three different colors which is just awfully bad design.
But before fixing that i had to take care of another problem. The standard style has for a long time used a strong blue tone for transportation and accomodation related symbols – bus stop, parkings, hotels, campsites and things like that. This use of blue – although with a long tradition in OSM – does not really work well for an intuitive understanding of the map and conflicts with any water related features you might want to use a strong blue for. So i did a bit of re-organizing of the symbol colors – expanding use of the violet color previously reserved for air transport for what was previously using blue. This requires some getting used to of course. At the same time i removed the use of green for leisure related point symbols which had recently been introduced and which – just like blue being reserved for water – should be reserved mostly for vegetation related features.

Violet color for transportation and accomodation symbols
This frees the strong dark blue for water related point features.
Spring rendering is something that has been changed in OSM-Carto recently but not in a very advantegous way. The primary motivation for the change was to get rid of the old symbol which was a small ‘s’ shape (standing for spring) which is obviously not ideal for an international map. But it is important to see that apart from this the old design worked quite well as a simple point icon starting at relatively low zoom levels because is was very compact and non-obtrusive and at the same time it was very recognizable and clear.
 and new (right)")
Rendering of springs in OSM-Carto – old (left) and new (right)
The new design – while well intended – does not really work that well for multiple reasons
- the generic circle is very non-specific and could likewise indicate all kind of other water related features (or not water related given that strong blue is also used for other purposes).
- the symbol is bigger and more obtrusive without being clearer to read than the old one. It creates much more noise in the map, especially at low zoom levels.
- layering places the symbol below waterways which creates all kinds of problems as is but especially since it depends on the water layer ordering (with line features above the polygons) which is a rather limiting contraint.
My approach here is based on using the same base design for different water source point features with variations indicating the specific type of feature. I try to make it very compact so it does not take much more space at the low zoom levels than the legacy ‘s’ symbol. The symbol size is increased a bit for better readability two zoom levels above the starting zoom level. Here is how this looks. Wells start one zoom level later than springs (z15 and z14) and fountains start at z17.

rendering of water sources at z14, z15 and z16
")
rendering of water sources at z17 (click for z18)
As you can see the base shape is the same for springs connected to waterways and isolated ones so it is recognizable this is the same type of feature. But the connected spring rendering of course has to be adjusted to the waterway rendering so it does not look exactly identical. And i added rendering for hot springs and geysers with a red center dot. Intermittent standalone springs are also differentiated with a symbol variation. And at higher zoom levels you can also see new symbols for amenity=water_point and man_made=water_tap.
The rendering of springs connected to a waterway is implemented by generating the symbol geometry in SQL. Like with the water barriers this requires parametrization of the waterway line width depending on zoom level from within SQL. An alternative approach would be to use SVG markers and rotate them based on the waterway direction but you would need a large number of different SVGs for every line width which in the end would not be any less complicated overall.
Another novelty is the addition of a supplemental beaker symbol that is being rendered next to the main symbols at higher zoom levels for water sources with a supplemental amenity=drinking_water or drinking_water=yes tag. This is another case where the limitations of the rendering toolchain are visible – ideally placement of the supplemental symbol would be whereever there is room for it but i don’t think this is possible with the tools used by the style. So i just went with a simple constant northwest position. What would be possible is to place the symbol for connected springs so it does not cover the waterway.
The small symbols for water sources are rendered with a thin bright halo for better visibility on dark and structured background. Here a few practical examples how this looks like in the map.

Springs connected to streams at z15

Wells at z16

Standalone spring at z16

Spring connected to stream at z18

Fountains and well at z17

Fountains and well at z18
Summary
What i have shown here are a number of cartographic design techniques that can help creating better maps:
- using interrelationships between different map elements (specifically water related point features and the waterway they are located on) to create a more harmonic and less noisy map image and provide additional information (like waterway direction) to the map reader.
- using subtle symbol variations to visualize similar features allowing for more detailed information in the map without adding a lot of complexity to interpretation, using compound symbols to transport additional information (here: indicate availability of drinking water at a water source).
- using simplified version of symbols at smaller scales for a more compact representation of features.
- unifying different forms of mapping the same type of feature (here: water barriers mapped with nodes and ways) into a unified design for different map scales.
As always you can find the changes discussed here for studying and testing in the alternative-colors style.