Warps
This tutorial describes the use of Povray's warp statement.
It is a pattern modifier that was introduced in Povray 3.1 in addition
to existing turbulence. The
![]() Povray 3.1 documentation
gives a quite complete description about it's possibilities, but it is not
very easy to understand for the beginner. Furthermore i will also describe
the new warp types introduced with
Povray 3.1 documentation
gives a quite complete description about it's possibilities, but it is not
very easy to understand for the beginner. Furthermore i will also describe
the new warp types introduced with
![]() MegaPOV.
MegaPOV.
turbulence warps
|
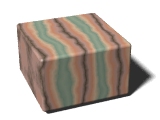
Before Povray 3.1 the only possibility to modify a
turbulence 0.4 |
|
|
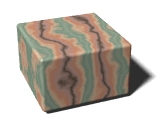
A similar effect is possible with the warp statement, namely the
It works just like turbulence and has the same optional keywords. Anyway the effect is not identical although it is similar.
warp { turbulence 0.4 } |
|
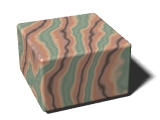
The main difference is the influence of
![]() transformations
like
transformations
like rotate, scale and translate.
While turbulence has the same effect no matter where you place it in
your pattern definition, warps are applied in the order they are written.
Example:
|
pigment { |

|
|
pigment { |
|
That are the main things about turbulence warps, of course you can use several of them in one pattern definition, also remember that turbulence can also take a vector so you can specify different amounts for different directions.
repeat warps
|
The repeat warp repeats a certain part of the pattern with a frequency and a direction specified with the vector that follows the repeat keyword. The vector has to lie in one of the axes.
warp { repeat x } |

|

|
|
Changing the length of the repeat vector changes the size of the repeated part.
warp { repeat x*0.5 } |

|
|
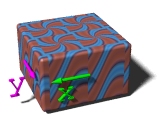
You can of course combine several repeat warps:
warp { repeat x } |
|
|
You can slightly change the repeated section with the optional offset keyword. The vector following that keyword specifies the direction and amount the pattern is moved with each repeat step.
warp { repeat x*0.5 offset y*0.25 } |

|
|
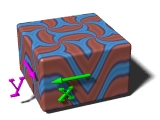
The last thing about the repeat warp is the
warp { repeat x flip x } |
|
black_hole warps
|
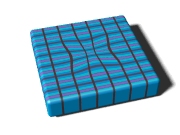
Another warp type is the The first parameter following the black_hole keyword is the point the black hole is located at. The second is the radius.
warp { black_hole <0.0, 0.0, 0.0>, 0.8 } |
|
|
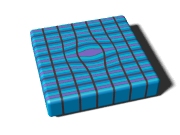
With the optional
warp { |
|
For seeing the effect of strength and falloff
have a look at some tabulated pictures.
|
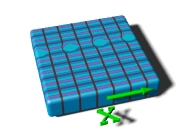
You can also place several black holes without using several warps
with help of the
warp { |
|
|
If the repeat vector is not parallel to one of the axes, the black hole is repeated in several directions.
warp { |

|
|
Finally you can also vary the position of the repeated warps
using
warp { |

|
|
When using repeated black hole warps, the warp has to be completely within one repeat segment. This also applies for turbulence meaning that the turbulated warp must have a correct position. This picture illustrates this requirement, for details consult the documentation. |

|
displace warps
This warp type requires
![]() MegaPOV.
MegaPOV.
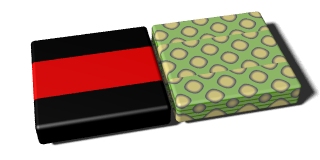
The displace warp uses a pigment for specifying the distortion. There are
two different types,
type 0, which is the default, uses the
red, green and blue value of the pigment to determine the displacement
in x, y and z direction.
This is a first very simple example, on the left is the pigment used for displacement, on the right the displaced pigment.
|
warp { |
|
|
Using also other colors adds displacement in the other directions.
warp { |

|
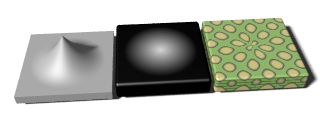
The type 1 displace warp uses
the gradient of the pigment to determine displacement. The pattern is
pushed away from dark areas and towards bright areas.
The object on the left is an isosurface with the brightness of the displace pigment as height. The warp displaces horizontally in the uphill direction.
|
warp { |
|
Also note, that when using pigments for displace warps, any color values including negative and larger than 1 can be useful.
Similar to the black hole warp I have some tabulated pictures for the displace warp.
That's all for now about warps, in megapov there are remaining cylindrical, spherical, toroidal and planar warps i will maybe write about later.
If you have any suggestions for improvements or find errors, feel free to contact me.
Christoph Hormann February 3, 2000


